Feeds:
Posts
Comments

DS dresdens


Well, it’s true what they say, that first year on the tenure-track is a doozy! The reason behind my lack of activity here is that work required quite a bit of focus over the last year. But I’ve still been sewing, and I’d like to try to catch up on sharing some of this work over the summer!
DS dresden quilt

First up is my dresden quilt which I finished hand quilting this winter. Instagram tells me I pulled the fabric for this quilt 90(!) weeks ago. I went through and found all of my Denyse Schmidt fabric, because I have been in love with her designs from day one, and have managed to amass quite a collection!

 DS dresden quilt

I wanted to play with color combinations by creating dresdens in a range of colorways. Some had a more limited palate, whereas others combined a bunch of colors. I left one dresden composed of all neutral fabrics, and included some “missing pieces” of neutral fabrics in the surrounding dresdens. There are even a couple of rainbow dresdens that I snuck in for good measure.

DS dresden quilt

Each dresden was machine appliqued to a background square composed of mixed neutral fabrics. One of the reasons this quilt took me a while (besides the size) was stitching up all the little pieces that make up the background blocks.

DS dresden quilt

The blocks were sewn into rows and then joined. I machine quilted in the ditch along the long rows before adding hand quilting around each dresden, as well as in the hexagons that I added to the middle of each dresden plate.

DS dresden quilt back

For the back, I continued with the theme, and chose fabrics in a range of colors from my DS stash. Each strip was cut selvedge to selvedge, and I added a gray row in the middle to make it big enough (I think the quilt top is around 85 inches square).

Hand quilting my DS dresden quilt

It took most of the winter to get the quilting done, but I am so glad with how it turned out. It is a very heavy quilt, due to the many layers of fabric, and it will be back on our bed when the fall returns.

DS dresdens in the woods


Framed Cabins Quilt Top

This month I’ve been working on assembling another quilt top for Do Good Stitches, the charity bee I’m a part of. I wrote up these instructions for my bee-mates, and I thought I’d share.

These blocks are a variation on a log cabin, and the blocks are constructed so that each “round” of the block extends to create a frame of sorts for the inner rounds of the block.

framed cabin block

The blocks are made in an improvisational manner and are squared up when complete.

The blocks are made up of a combination of low volume/neutral fabrics and saturated, colorful fabrics. I recommend using colors that pop! It makes the “frames” really stand out against the neutral background.


How to make the blocks:

To start, I grabbed my bag of strings, and sorted into 2 piles: my saturated, bright colors, and my low volume/neutrals. I think these look best when using strips that are about 2 inches wide or less.

Next, match up one saturated strip with one neutral strip that are approximately the same length, and stitch them together along the long edge. I did this for a bunch of strips at once by chain piecing them. One they’re stitched together, press the seams. These will be all of the “logs” that make up the cabin.

To begin constructing the block, take one saturated/bright square and on opposite sides, stitch a neutral scrap. It should look like this:

Step 1

Next, trim one long side to be straight. Grab one of the paired saturated fabric + neutral fabric strips, and sew the saturated side to the center piece. (Here’s a pic to help explain):

Step 2

Press the seams, and continue adding the pieced “logs” with the saturated strip matching up to the existing block, like so:

Step 3

Step 4

Step 5

As you can see, I just kept adding the pieced strips around the block until it was a size that I was happy with.

It’s a fairly simple block– just a log cabin made from the pieced strips, and arranging them as I described gives the “framed” look. I hope this brief tutorial was useful!

Economy Block Quilt backed in flannel


This past year I joined in an impromptu quilt-along that began on Instagram of friends and fellow quilters making economy block quilts. The economy block is an old one, and is pretty simple in its construction.


Far Far Away 2 + Hope Valley Economy Block Quilt
 

After playing around with the blocks, I found I liked making a variety of blocks that were both large and small, and by adding borders I could break up the regularity of the patterns. I also found this is a great way to fussy cut some patterns and feature some of the fabrics I’ve been holding onto for a while.

Flannel Economy Block Quilt Back
 

I backed the quilt in flannel (Folksy Flannel, designed by Anna Maria Horner) and as has become my norm, I used a bunch of scraps up in my quilt back.  Although, technically this isn’t a quilt because I skipped the batting. Because the flannel and fabrics in the quilt top were heavier, this had enough weight without the batting.

 
Economy Block Quilt

I kept the machine quilting simple, and I’m slowly working on adding some perle cotton handstitching. I love how cozy this one turned out!

Around the World Blog Hop

Dresden Quilt Top

My friend Amanda tagged me in the “Around the World” blog hop, and while I normally don’t jump on this sort of bandwagon, this blog hop has a bit of a different feel and I have loved reading the posts from my friends reflecting on their creative process. Plus I’ve been meaning to update my blog for FOREVER, but a lot has been going on behind the scenes here! I’m still sewing a ton (and I have SO MANY projects to share), but in the last couple of months I finished up my post-doc fellowship and took a tenure-track job, which involved moving to a new area and staring the new job. Things have been a bit crazy, to say the least! But carving out time for creativity has been so important to me, and documenting my work and my process goes along with this!

blue squares improv baby quilt

Like many of my friends, I also have made the switch to using instagram a little more frequently– namely because I don’t always have time to edit photos and write up a blog post, but I can snap a quick shot on my phone and share it right away. If you’re interested in seeing what I’m up to, I’m greenleafgoods on instagram; my profile is not public, but if you request to be friends I’ll be happy to add you!

Liz's quilt

1. What quilting/sewing thing am I working on?
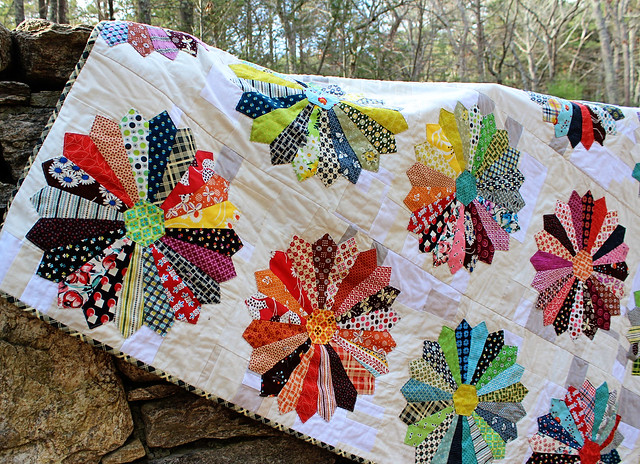
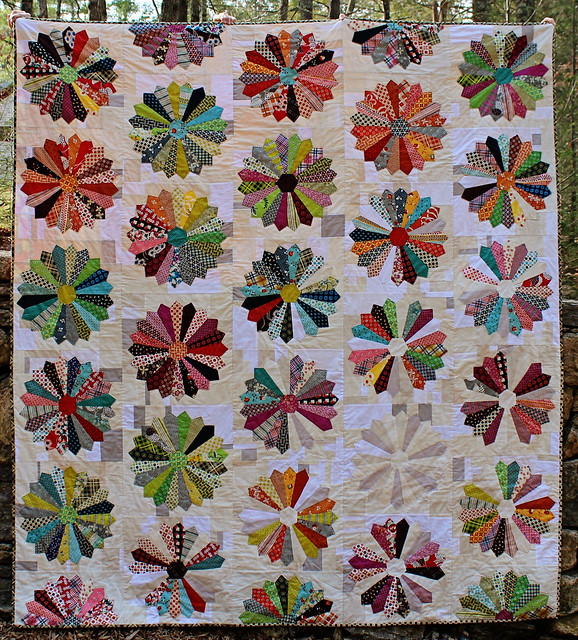
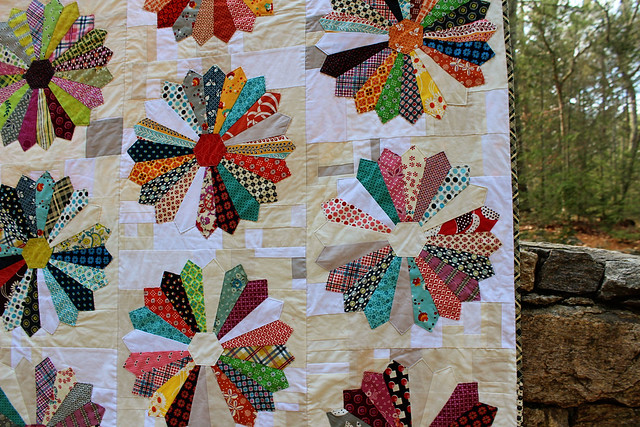
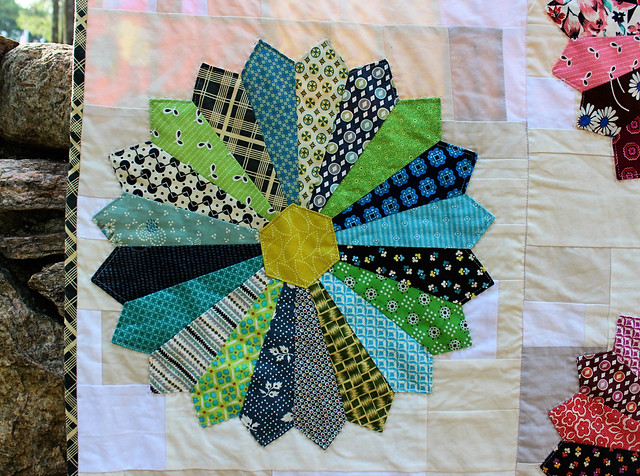
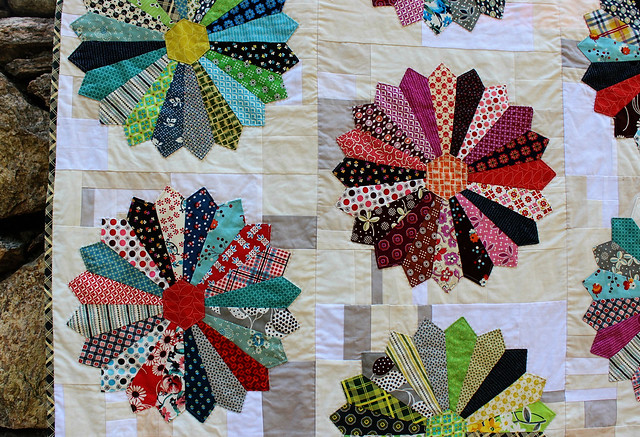
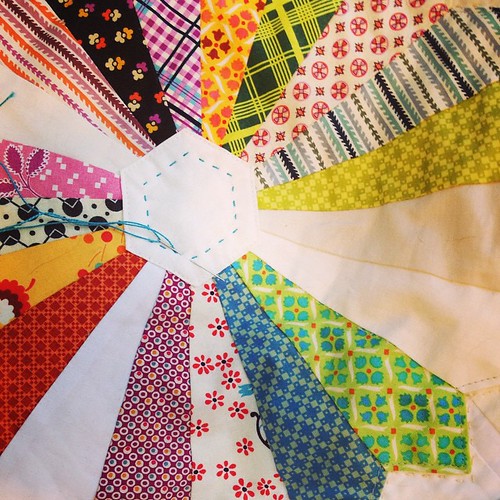
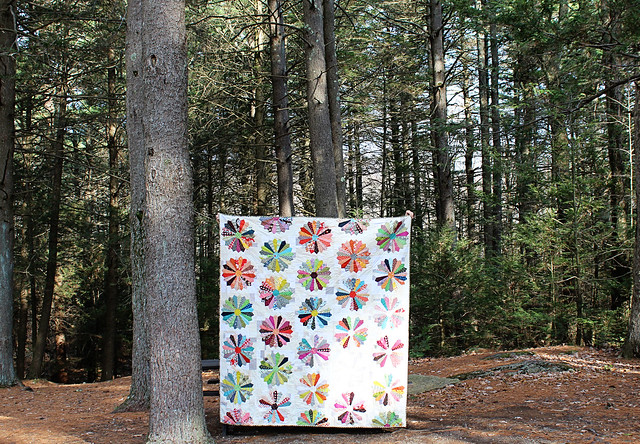
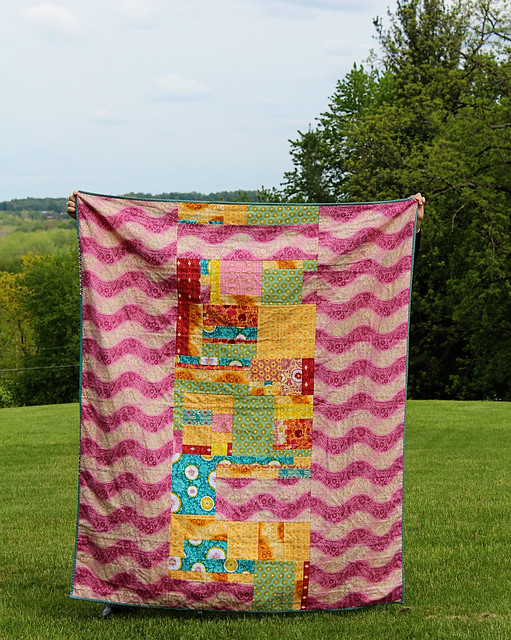
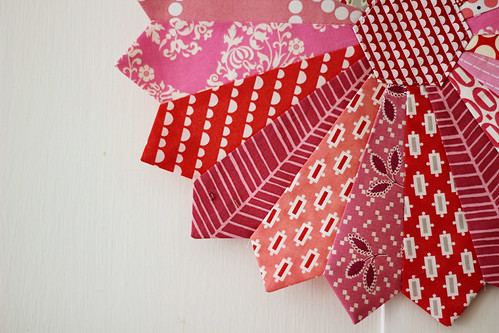
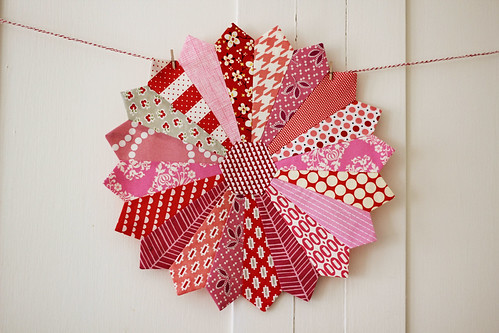
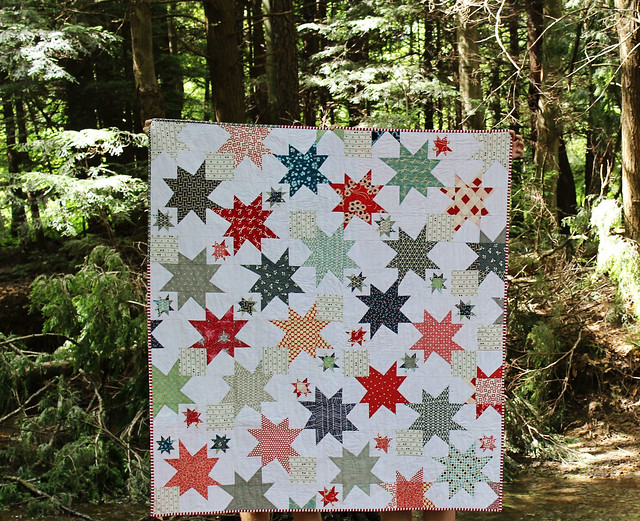
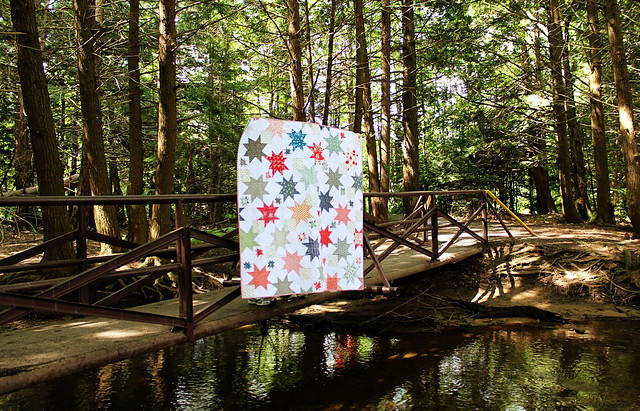
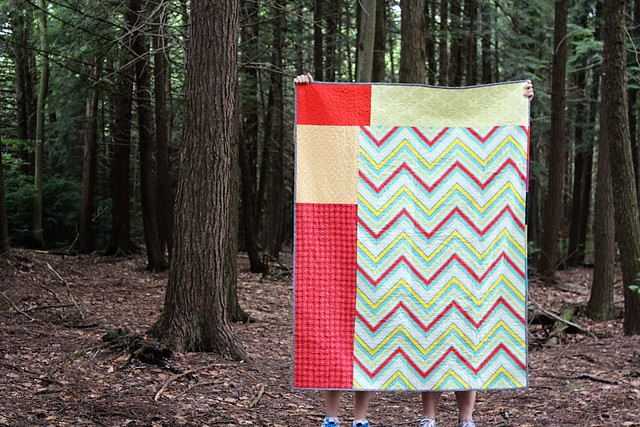
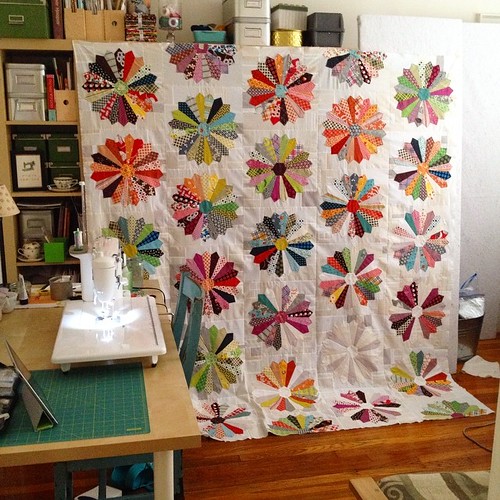
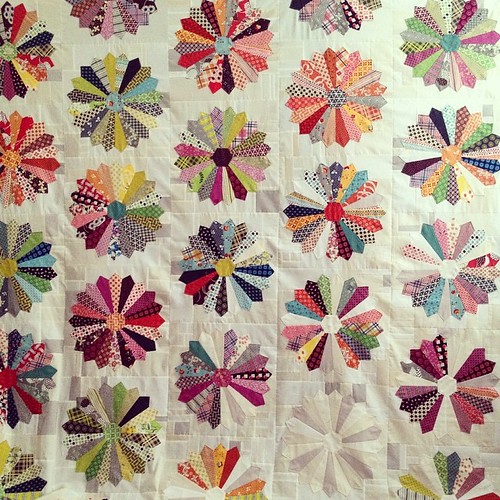
Ha, this question is kind of funny because I always have at least 3 (…or 4 or 5) quilts in progress at any given time. Realistically, I am finishing up binding on two quilts, I’m cutting and piecing another top, and I’ve been pondering how to quilt my dresden quilt top. I finished this beast up a few weeks back, and I think I’m close to figuring out how to finish it off!

I finished my DS Dresden quilt top today! It's so large I can barely get a full photo of it.

I also just acquired this sweet vintage singer featherweight, so I’ve been spending a little time cleaning her up and testing her out. She is in great shape, and her stitches are pretty perfect! I think I’ll be doing a lot of piecing on the featherweight from now on.

Guess what arrived today!!!!!! I may be a bit excited :)

2. How does my work differ from others of its genre?
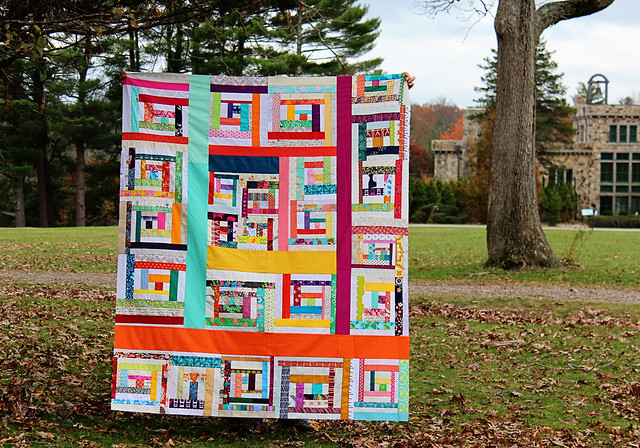
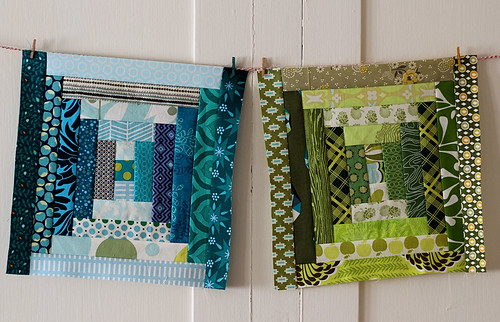
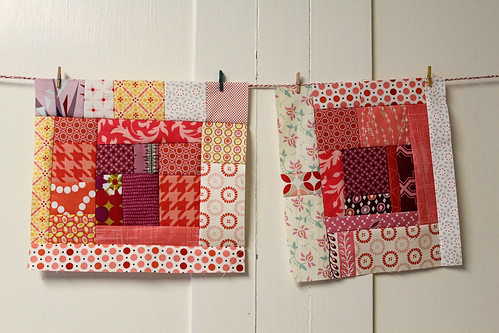
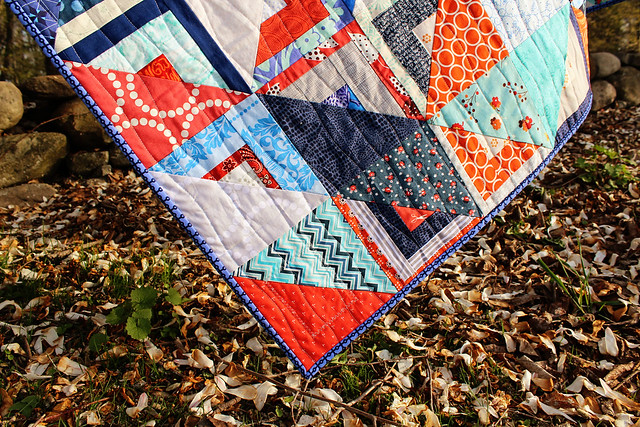
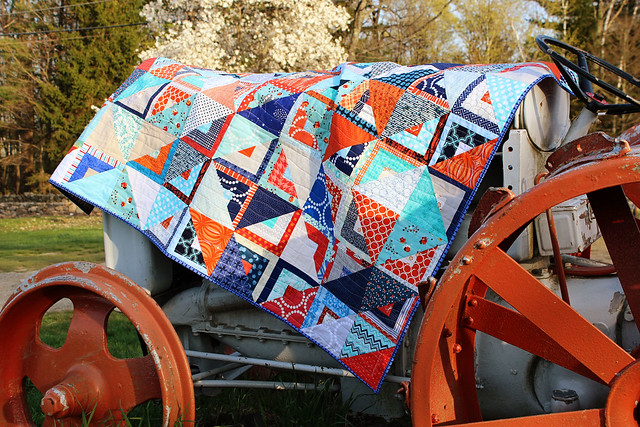
Well, in a lot of ways it doesn’t! I am constantly (seriously, constantly!) drawing inspiration from the work of my peers, and I feel very at home in the “modern quilt” genre. And this can mean a lot of things, as debate about modern quilting has revealed. But after making many, many quilts I’ve realized that I heavily favor the improv process. I *can* paper piece when I need to, but I don’t really enjoy it! I also think a LOT about incorporating traditional elements into modern designs. Again, I know I’m in good company here!

Wonky Pinwheel Quilt Top

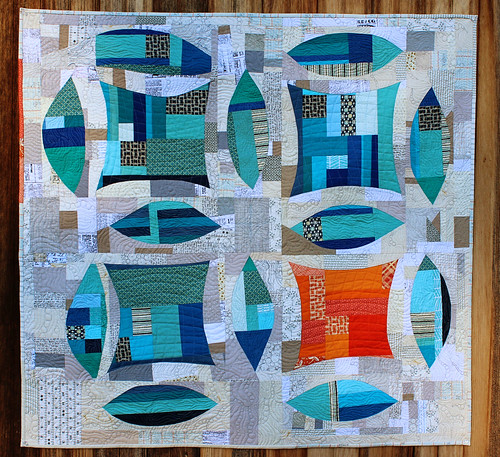
The one way I differ from a number of other quilters is that I tend to not use patterns. I will often look at patterns to see construction and piecing techniques, but then I take that knowledge to figure out what works for me. For example, when working on my improvisational double wedding ring quilt, I focused on techniques for sewing improv curves. Once I had that mastered, I felt very confident that I could execute my design.

improv double wedding ring

3. How does my writing/creating process work?

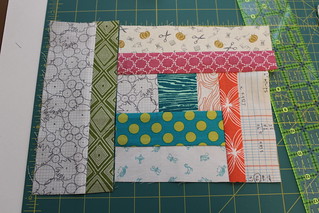
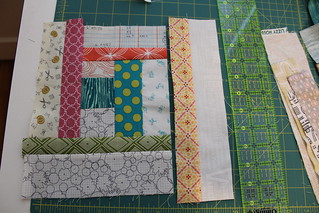
This is really a cyclical process. I am often inspired when I see someone else’s work, though usually I identify an element of the work that stands out to me (for example, I love the colors they chose, or that’s an interesting block design, or I love how they laid out their quilt top) and then I think about what aspect of the design I would want to incorporate into my own work. Every once in a while I’ll see something that I just want to make my own version of, but usually I’ll latch onto an idea and then mull it over for a while. Part of this process is then searching out all examples of the particular method or design I’m interested in and looking at all the variations to see what resonates with me. This part of the process usually has a couple of criteria– I have to find something visually appealing AND I have to think through whether I’d find the process of creating the project enjoyable. Sometimes I find something I love, but I know that I wouldn’t find it that fun to make, so I think about what version would be fun for me to work on.

improv double wedding ring

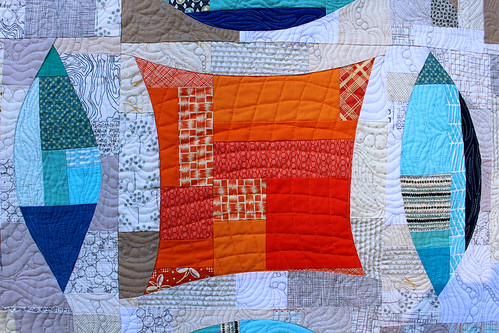
For example, when I began my improv double wedding ring, I searched high and low for other improvisation DWR quilts. As you can imagine, there aren’t many! Next I identified my process– the improv curves I’d need to make my shapes. I also considered the layout, and how I’d nest the curves so that all the shapes would line up. During this phase I often draw rough sketches to see if my ideas are practical. Then I dive right in– I find the best way to learn is to try it out, so I start cutting and sewing and see where things go.

Farmhouse Quilt Top

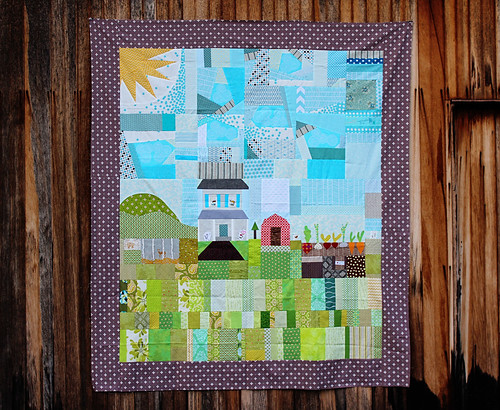
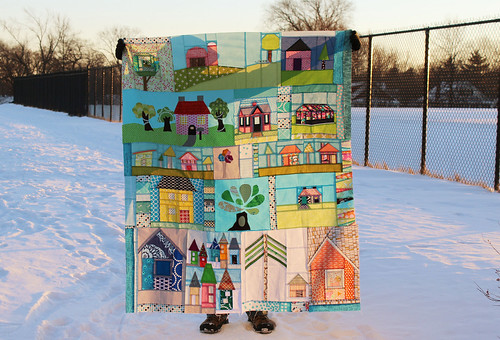
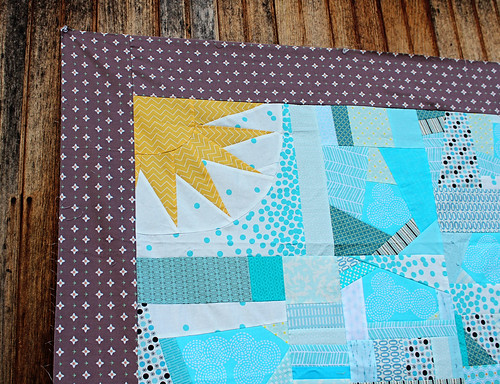
Here’s another example: I was asked to make a quilt that showed a family home and incorporated elements that were unique to the family. I took a photo of their house, and then searched for all sorts of patterns that might approximate this shape. I found a good one, and started paper piecing it– but it wasn’t feeling right. I modified my approach to be improv, and I added things like the kids in the windows and the cat on the porch.

Farmhouse Quilt House and Barn

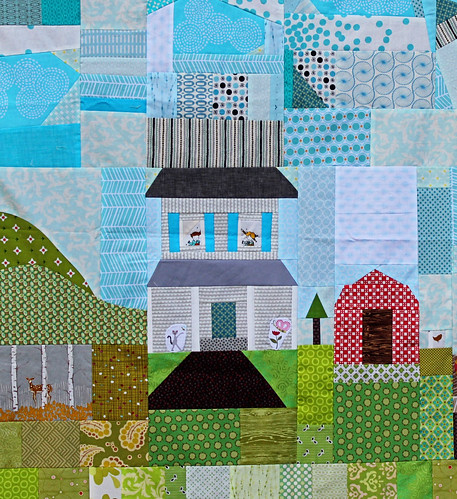
I knew I needed to add a mountain to the back left of the quilt, and a garden to the right, with some wildlife mixed in.

Farmhouse Quilt Garden

Farmhouse Quilt Mountains and Wildlife

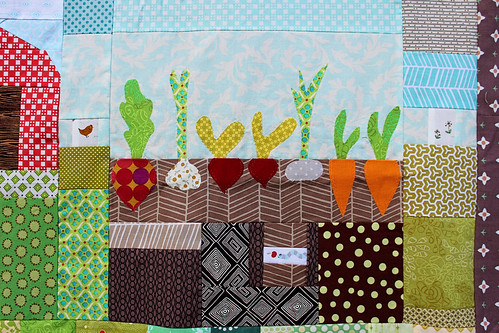
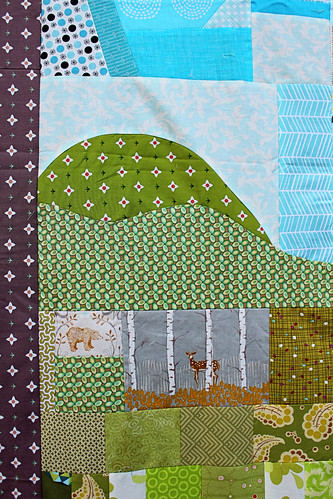
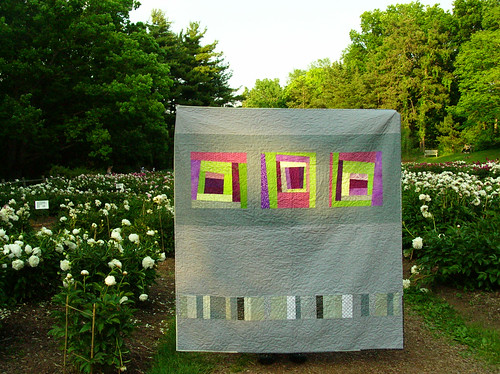
This was the most fun to make, because it was so challenging but so freeing to just put things together and see what worked. For the garden, I was inspired by the purl bee mini quilt, and I did a smaller version in the quilt. I also used improv patchwork for the sky and grass and dirt, and pulling these sections together was so much fun.

Farmhouse Quilt Improv Sun and Sky

Overall, I try to start with a rough vision of what I want to make, and I look for examples to draw from to inform my choices during the design and implementation phases. But I’m also always open to seeing where things go– sometimes I work on something that just doesn’t “work” and I listen to the quilt top to tell me when things are feeling right and when they need to change. It’s an unpredictable process, but that’s what I love about it.

Now I’d like to encourage some of my friends to join in and share their process. I’d love to hear from my friends Kristie (of OCD: Obsessing Crafting Disorder), who constantly amazes me with her productiveness and eye for color and composition, and Kate (of The Story of Kat), who continues to make quilts I want to steal, and creates the most amazing original embroidery designs.

Thanks for reading my super-long post! I’m planning to share some more of my quilt finishes soon!

Do Good Stitches

dresden closeup

I love being part of the do good stitches quilting bee, it challenges me to design quilts that will be fun for my fellow bee members, and asks me to try new things when I’m sending in blocks for a quilt.

do good stitches bee blocks

I thought it was time to do a little round-up of recent work for the bee. These blocks I made for Rachel this month.

do good stitches bee block

Ara Jane asked us for courthouse steps blocks. These were so fun to make, and the sneak peek of the quilt she gave on instagram recently was gorgeous!

January bee blocks

Last month I asked for blocks I designed using a scrappy log cabin approach. This quilt has been so fun to put together, and I’m thinking I’ll do a little tutorial with my instruction for this quilt block soon.

DGS bee blocks

DGS bee blocks 2

I quilted my happy houses quilt, and am finishing up binding it by hand now. I love how it turned out, too– it’s a testament to the creativity and skill of the members of my circle!

Happy Houses Quilt Top

improv double wedding ring

I’ve had this idea for a while to try to make more traditional quilt designs with an improvisational approach. After many hours in the sewing room, I’ve discovered that I need to use this time to just play, and for me, that is what improvisational sewing is all about. What I love about this approach is that there are no rules, and if you don’t love something cut it up and start over, or transform it into something else.

improv double wedding ring

I wanted to take on making my own modern version of the double wedding ring quilt, and I knew this would push me because of all of the curved pieces in this design. Every curve was cut freehand and sewn without pins, and rulers were only used to square up larger pieces. I really tried to let go of the rules on this one!

improv double wedding ring

After looking at lots of photos of traditional double wedding ring quilts, I mentally deconstructed the pattern into its most basic forms, and then created these out of improvisationally pieced panels of fabric.
In my quilt, the rings are made up of the negative (light colored) spaces. It makes the “rings” more subtle, though they’re still there. I also chose to piece everything from scraps, as I think this gives the quilt more depth and visual interest.

improv double wedding ring

I also wanted the quilting to complement the design, so I rolled up my sleeves and quilted different free-motion designs in different areas of the quilt. It took me quite a while, but I think it was worth it. I’ve never quilted a quilt so heavily– and I likely won’t do this often– but it’s nice to know I can when the design warrants this level of quilting detail.

Free Motion Quilting on the improv double wedding ring quilt

One reason I was motivated to finish this quilt was so that I could enter it into the double wedding ring quilt challenge that is wrapping up at the end of the month. There are so many cool quilts entered already, and I love seeing how differently people can interpret the same design.

improv double wedding ring mini quilt

I also wanted to test my design out on a smaller scale, so I finished a mini quilt using the same improv techniques. For this quilt, I used organic wavy lines for the quilting.

improv double wedding ring mini

improv double wedding ring mini

It finished up quickly, and I had so much fun sewing it. I highly recommend taking a little time to just play around with your scraps and designs to see what happens!

improv double wedding ring

Weekender Pocket Quilt as You Go

Hey friends! I’ve shared a guest post over on the Boston Modern Quilt Guild Blog today about how I’m making patchwork panels for my Weekender Bag. Check it out if you’re interested!

This weekend I was also busy finishing up this large quilt top.

Marcy's Quilt Top

I was lucky and had some help in the sewing room– my sister cut out some Weekender pattern pieces for me (thanks Liv!) and I was able to get going on my patchwork panels. I am excited to see this bag come together!

Weekender Pocket

Finished Half Square Triangle/Log Cabin Quilt

I’ve fallen a bit behind in blogging about my finished quilts this summer, but I wanted to keep a record of these finishes here. I’d guess I have at least 10 quilts I’ve finished that I haven’t blogged about– yikes! I’ll try to do some catching up.

Quilting detail on thr HST/LC quilt

Thanks for holding my quilt, tractor!

Wavy Quilting Lines

Do Good Stitches Log Cabin/Half Square Triangle Quilt

First up, I finished this quilt along with the help of the Love circle of the Do. Good Stitches charity bee. We usually send these quilts off to be distributed by the group Wrap them in Love, but this time I had a special request. My neighbor had been battling cancer, and I knew he was going into hospice care. I thought the quilt might lift his spirits, and the members of my bee agreed that this would be a good home for our quilt. Sadly he passed away just after I finished the quilt, but I know his family was very moved by the gift and continues to use the quilt.

July Quilt

July Quilt

Patchwork July Quilt Back

Next, I finished what I think of as my 4th of July quilt. I’m not usually into Americana, but there is something about the red and blue stars that I love. I also used one of my favorite ruler prints as a neutral in this quilt. It was good to get this one finished!

stacked coins quilt

stacked coins quilt back

My office mate at work was getting married this summer, and from the day that I hung a mini-quilt on our office wall she’s shown an interest in and appreciation for my quilting hobby. I made this simple stacked coins quilt for her and her new husband to enjoy. I used the colors from the Chicopee fabric line as my guide, and made each stack of coins centered around one color. I love simple quilts like this one, they are so enjoyable to put together.

stacked coins quilt

I have a few more finishes to share soon, including some quilts I recently wrapped up for the Lowell Quilt Festival. If you’re in the New England area you should consider checking it out– the Boston Modern Quilt Guild has an exhibit, and all the details can be found here. I’ll share some photos of those quilts once I go visit them in the show!

BMQG_Common08

I’ve been meaning to post these photos from our sew-in for the last week, but life is just flying by this summer!
BMQG_Common16

I met up with some of the dedicated members of the BMQG in downtown Boston so that we could work on binding and
labeling quilts together.

BMQG_Common20

It was a hot and sunny day on the common, and we we so lucky to have Taz come to take some photos for us! She does such lovely work, and you can check out more of here photos here.

BMQG_Common09

Our pile of finished quilts is growing, and we’re gearing up to make a few big deliveries soon. We still have many quilts in progress, too. This has become such a larger project than I could have imagined, and I’m so grateful for all of the help and support that our guild has received!

BMQG_Common21b

There are more quilt photos being added to our flickr group all the time, so keep checking back to see the finished quilts!

Scrappy stars! For @jaceynotjc

Today is my birthday, and I’m trying to resist the birthday blues by taking the day off work and making myself a new bag. There are a couple of things that I wanted to share because I think they are amazing, and I hope you enjoy them too!

First up, this is by far the best use of Pinterest I have ever seen. Seriously, take a minute to check it out.

Second, I’ve been in love with this song and music video for the last few months. I could watch it every day. WordPress is being tricky and won’t allow me to embed the video, but this link will take you to youtube to watch it. Trust me, it’s a good decision!